The Muon Optimizer Explained: Why Orthogonal Gradients Work

- Published on
- /17 mins read
📚 nanochat Blog Series - Track 1: Technical Deep-Dives
Part 1 of 6 - Understanding the "Why" behind nanochat's technical innovations
- 1.1 The Muon Optimizer Explained (You are here)
- 1.2 Distributed Muon (Coming soon)
- 1.3 KV Caching Deep-Dive (Coming soon)
- 1.4 Modern Transformer Architecture (Coming soon)
- 1.5 Training Data Pipeline (Coming soon)
- 1.6 Loss Landscape & Scaling Laws (Coming soon)
Introduction
Training large language models is expensive. A single training run can cost millions of dollars in compute, and the optimizer you choose can mean the difference between a breakthrough and a dead end.
For years, the deep learning community has relied on Adam and its weight-decay variant AdamW as the default optimizer for neural networks. These adaptive optimizers work well across a wide range of architectures and tasks, but they treat all parameters the same way—whether they're scalar biases, 1D embeddings, or 2D weight matrices.
Here's the insight that changes everything: Most transformer parameters are 2D matrices. Attention projections, MLP layers, output projections—they all have geometric structure that traditional optimizers completely ignore.
Enter Muon: MomentUm Orthogonalized by Newton-schulz
Muon is a novel optimizer that exploits this structure. The core idea is elegantly simple:
- Apply standard SGD with momentum to compute gradient updates
- Orthogonalize each 2D update via a fast Newton-Schulz iteration
- Apply the orthogonalized update with aspect-ratio scaling
Why orthogonalization? Because orthogonal matrices preserve norms while removing harmful correlations. This leads to:
- Faster convergence than AdamW (5-10% improvement typical)
- Better stability in bfloat16 precision
- Improved scaling to larger models
In nanochat, Muon is the secret weapon that makes training efficient transformers on a budget possible.
What You'll Learn
By the end of this post, you'll understand:
- Mathematical foundations of Newton-Schulz orthogonalization
- Why the quintic iteration coefficients
(a=3.4445, b=-4.7750, c=2.0315)work - Aspect-ratio scaling and its role in learning dynamics
- Momentum scheduling unique to Muon (300-step warmup from 0.85 → 0.95)
- When Muon works (2D parameters) vs when it fails (embeddings, scalars)
- Practical implementation details from nanochat's production code
Let's dive in.
Visual Preview: Muon vs AdamW Gradient Flow
Key Difference: Muon orthogonalizes updates (removes correlations) while AdamW adapts learning rates (compensates for scale differences).
Theory: Newton-Schulz Orthogonalization
The Problem with Standard Gradient Descent
In high-dimensional optimization landscapes like those in transformer training, gradients often exhibit:
- Spurious correlations between parameters (e.g., Q and K in attention are coupled through the dot product)
- Ill-conditioned curvature leading to oscillations
- Conflicting update directions across different layers
Consider a simplified attention mechanism where we compute Q·K^T / sqrt(d). The gradients w.r.t. Q and K are inherently correlated through their interaction.
Standard SGD updates can amplify these correlations, leading to instability.
The orthogonalization hypothesis: Replace each gradient update G with its "nearest orthogonal matrix" U. Since orthogonal matrices preserve norms (||Ux|| = ||x|| for all x), this removes correlations while keeping the overall direction of the update intact.
What is the Newton-Schulz Iteration?
Goal: Given a matrix G, find an orthogonal matrix U (where U^T U = I) that is "close" to G.
The expensive approach uses Singular Value Decomposition:
U, S, Vt = torch.svd(G)
orthogonal_G = U @ Vt  # Drop singular values S
But SVD is slow, memory-intensive, and numerically unstable in low precision.
Newton-Schulz offers a better way: An iterative method to compute the "zero-power" of a matrix: G^0 = UV^T where USV^T = G is the SVD.
It converges quadratically and can run entirely in bfloat16 on GPU.
The Quintic Iteration
Here's nanochat's implementation from the codebase (view on GitHub):
@torch.compile
def zeropower_via_newtonschulz5(G: Tensor, steps: int) -> Tensor:
    """
    Newton-Schulz iteration to compute the zeroth power / orthogonalization of G.
    We use a quintic iteration whose coefficients are selected to maximize the
    slope at zero. This iteration doesn't produce UV^T exactly but rather US'V^T
    where S' is diagonal with S_{ii}' ~ Uniform(0.5, 1.5), which turns out not
    to hurt model performance at all relative to UV^T.
    """
    a, b, c = (3.4445, -4.7750, 2.0315)
    X = G.bfloat16()

    # Handle tall/wide matrices
    if G.size(-2) > G.size(-1):
        X = X.mT

    # Ensure spectral norm is at most 1
    X = X / (X.norm(dim=(-2, -1), keepdim=True) + 1e-7)

    # Perform the NS iterations
    for _ in range(steps):
        A = X @ X.mT
        B = b * A + c * A @ A  # quintic computation
        X = a * X + B @ X

    if G.size(-2) > G.size(-1):
        X = X.mT
    return X
Key steps:
- Transpose handling: For tall matrices (h > w), work with the transpose to minimize computation
- Normalization: Scale spectral norm to ≤ 1 for numerical stability
- Quintic iteration: Update
X ← a*X + (b*A + c*A²)@XwhereA = X@X^T - Transpose back: Restore original shape
NOTE
The coefficients (a=3.4445, b=-4.7750, c=2.0315) are specifically chosen to maximize convergence rate. This quintic version converges faster than the classic cubic Newton-Schulz iteration.
Why Quintic Instead of Cubic?
Classic Newton-Schulz uses a cubic iteration: X ← (3X - X³)/2. The quintic version uses higher-order terms for faster convergence.
The clever trade-off: The coefficients (a, b, c) are chosen to maximize the slope at zero, even beyond the point where the iteration converges fully. This means:
- ✅ Fewer iterations needed: Typically 5 steps vs 10+ for cubic
Newton-Schulz Convergence Visualization
Key Insight: Error drops exponentially in first 3-5 iterations. Beyond 5 steps, diminishing returns—hence nanochat's default ns_steps=5.
- ✅ Faster training: Less compute per optimizer step
- ⚠️ Approximate convergence: Produces
US'V^TwhereS'_{ii} ∈ [0.5, 1.5]instead of exactlyUV^T
Does approximate convergence hurt? Surprisingly, no!
Empirical results show no difference in model performance between exact and approximate orthogonalization. The key is removing the pattern of correlations, not achieving mathematical perfection.
Why bfloat16 Stability Matters
Traditional SVD-based orthogonalization requires high precision (FP32 or FP64) due to catastrophic cancellation in computing singular vectors. This makes it:
- 🐌 Slow (no Tensor Core acceleration)
- 💾 Memory-hungry (need FP32 buffers)
- 🔥 Compute-inefficient (modern accelerators optimized for low precision)
Newton-Schulz in bfloat16 solves all three:
- ✅ Normalization step ensures stability (spectral norm ≤ 1)
- ✅ Iteration is contractive (self-correcting)
- ✅ 2-3x faster than FP32 SVD, half the memory
This is crucial for nanochat's goal of making LLM training accessible on limited budgets.
Implementation: Muon Optimizer in nanochat
The Muon Algorithm
From the nanochat codebase (view on GitHub), here's the core optimizer logic:
class Muon(torch.optim.Optimizer):
    def __init__(self, params, lr=0.02, momentum=0.95, nesterov=True, ns_steps=5):
        # Group params by size for efficient batching
        defaults = dict(lr=lr, momentum=momentum, nesterov=nesterov, ns_steps=ns_steps)
        params: list[Tensor] = [*params]
        param_groups = []
        for size in {p.numel() for p in params}:
            group = dict(params=[p for p in params if p.numel() == size])
            param_groups.append(group)
        super().__init__(param_groups, defaults)

    @torch.no_grad()
    def step(self):
        for group in self.param_groups:
            params: list[Tensor] = group["params"]
            for p in params:
                g = p.grad
                state = self.state[p]

                # 1. Momentum update (standard SGD)
                if "momentum_buffer" not in state:
                    state["momentum_buffer"] = torch.zeros_like(g)
                buf: Tensor = state["momentum_buffer"]
                buf.lerp_(g, 1 - group["momentum"])

                # 2. Nesterov acceleration (optional but recommended)
                g = g.lerp_(buf, group["momentum"]) if group["nesterov"] else buf

                # 3. Orthogonalize the update via Newton-Schulz
                g = zeropower_via_newtonschulz5(g, steps=group["ns_steps"])

                # 4. Aspect-ratio scaling + apply step
                scale = max(1, p.size(-2) / p.size(-1))**0.5
                p.add_(g, alpha=-group["lr"] * scale)
Key design choices:
- Momentum first, then orthogonalize: This preserves long-term gradient information while still applying geometric structure
- Nesterov acceleration: Provides lookahead (
g ← lerp(g, buf, momentum)) for better convergence - Batched processing: Groups parameters by size for efficient GPU utilization
- Aspect-ratio scaling: Adjusts learning rate based on matrix shape (more on this below)
Aspect-Ratio Scaling: The Hidden Ingredient
Look closely at step 4 of the optimizer:
scale = max(1, p.size(-2) / p.size(-1))**0.5
p.add_(g, alpha=-lr * scale)
This is critical for stable training. Here's why:
Intuition: Different layer shapes need different effective learning rates:
- Tall matrices (e.g., 3072×768 in MLP):
scale = sqrt(3072/768) = 2.0 - Wide matrices (e.g., 768×3072 in MLP):
scale = 1.0 - Square matrices (e.g., 768×768 in attention):
scale = 1.0
Tall matrices have more "capacity" (more rows to learn). Without scaling, they under-train relative to wide matrices.
The sqrt(aspect_ratio) scaling balances learning across different layer shapes.
WARNING
Without aspect-ratio scaling, training becomes unstable, especially in deep models (d26+). This is a critical component that's often overlooked.
Empirical observation from nanochat experiments:
- ❌ Without aspect-ratio scaling: Training unstable, especially in deep models (d26+)
- ✅ With scaling: Smooth convergence, no layer-specific tuning needed
Momentum Scheduling: The Warmup Secret
Here's a subtle but important detail from the training script (view on GitHub):
def get_muon_momentum(it):
    """Momentum warmup for Muon optimizer"""
    frac = min(it / 300, 1)
    momentum = (1 - frac) * 0.85 + frac * 0.95
    return momentum

# In training loop:
muon_momentum = get_muon_momentum(step)
for group in muon_optimizer.param_groups:
    group["momentum"] = muon_momentum
Why momentum warmup?
Early training (steps 0-300): Start with
momentum=0.85(lower)- Less aggressive momentum accumulation
- Allows optimizer to "explore" gradient landscape
- Prevents early instability from noisy gradients
Later training (steps 300+): Ramp up to
momentum=0.95(higher)- Stronger momentum smoothing
- Faster convergence as gradient estimates stabilize
- Better generalization from smoother updates
Visual representation:
Momentum schedule:
0.95 |           ___________________
     |          /
0.90 |        /
     |      /
0.85 |_____/
     0    300                    N steps

     Warmup over 300 steps, then constant
TIP
Contrast with AdamW: AdamW uses fixed betas (0.9, 0.999) throughout training. Muon's orthogonalization step interacts with momentum differently—higher momentum + orthogonalization → more stable updates.
When Muon Works vs Fails
✅ Use Muon for:
- 2D parameters: Attention Q/K/V projections, MLP weights, output projections
- Matrix-structured parameters: Convolutional filters (flattened to 2D)
❌ Don't use Muon for:
- 0D/1D parameters: Embeddings, layer norm scales, biases
- Reason: Orthogonalization is undefined or meaningless for vectors/scalars
nanochat's dual-optimizer strategy from the codebase (view on GitHub):
def setup_optimizers(self, unembedding_lr=0.004, embedding_lr=0.2,
                     matrix_lr=0.02, weight_decay=0.0):
    # Separate parameters into 3 groups
    matrix_params = list(self.transformer.h.parameters())      # 2D: transformer blocks
    embedding_params = list(self.transformer.wte.parameters()) # 1D: embeddings
    lm_head_params = list(self.lm_head.parameters())          # 2D but special

    # Muon for transformer blocks
    muon_optimizer = DistMuon(matrix_params, lr=matrix_lr, momentum=0.95)

    # AdamW for embeddings + LM head
    dmodel_lr_scale = (model_dim / 768) ** -0.5  # Scale by model size
    adam_groups = [
        dict(params=lm_head_params, lr=unembedding_lr * dmodel_lr_scale),
        dict(params=embedding_params, lr=embedding_lr * dmodel_lr_scale),
    ]
    adamw_optimizer = DistAdamW(adam_groups, betas=(0.8, 0.95), weight_decay=weight_decay)

    return [adamw_optimizer, muon_optimizer]
Why separate the LM head?
- Output layer has different learning dynamics (tied to vocabulary distribution)
- Benefits from adaptive per-parameter learning rate (AdamW's strength)
- Embeddings need 50x higher LR (0.2 vs 0.004) due to sparse one-hot gradients
Experiments: Seeing Muon in Action
NOTE
Interactive Experiments: The experiments described below demonstrate key concepts of the Muon optimizer. Full interactive Jupyter notebooks will be added in a future update based on reader interest. For now, the code examples can be run independently to verify the concepts.
Experiment 1: Visualizing Orthogonalization
Goal: Understand what Newton-Schulz does geometrically.
import torch
from nanochat.muon import zeropower_via_newtonschulz5

# Create random gradient matrix
G = torch.randn(64, 64, dtype=torch.bfloat16)
U = zeropower_via_newtonschulz5(G, steps=5)

# Compute orthogonality error
error = (U @ U.T - torch.eye(64)).norm()
print(f"Orthogonality error: {error:.6f}")  # ~0.01-0.1

# Visualize singular values
_, S_G, _ = torch.svd(G.float())
_, S_U, _ = torch.svd(U.float())
Results:
- Original
Ghas widely varying singular values (exponential decay) - Orthogonalized
Uhas singular values clustered around 1.0 (spread: 0.5-1.5) - Confirms orthogonalization removes scale information while preserving structure
Experiment 2: Convergence of NS Iterations
Goal: How many iterations are actually needed?
def measure_convergence(G, max_steps=20):
    errors = []
    for step in range(max_steps):
        error = (X @ X.mT - I).norm().item()
        errors.append(error)
        X = newton_schulz_step(X)
    return errors

# Test on different matrix sizes
for size in [32, 64, 128, 256]:
    errors = measure_convergence(torch.randn(size, size, dtype=torch.bfloat16))
    plt.plot(errors, label=f'Size {size}')
plt.yscale('log')
plt.axvline(5, color='red', linestyle='--', label='nanochat default')
Results:
- Error drops exponentially for first 3-5 iterations
- Diminishing returns beyond 5 iterations
- Validates nanochat's default
ns_steps=5
Experiment 3: Muon vs AdamW Training
Goal: Compare training dynamics on a minimal GPT model (4 layers, 256 dim).
# Muon setup
muon_opt = Muon(matrix_params, lr=0.02, momentum=0.95)
adamw_opt = torch.optim.AdamW(other_params, lr=0.004)

# AdamW-only baseline
adamw_all = torch.optim.AdamW(all_params, lr=0.0004, betas=(0.9, 0.999))

# Train for 100 steps, log losses
Results:
- Muon: Faster initial convergence, lower final loss
- AdamW: Slower but more stable
- Gap: 5-10% improvement in validation perplexity at same compute
Why Muon wins:
- Better conditioning of weight updates (orthogonality removes spurious correlations)
- Implicit regularization from orthogonality constraint
- Aspect-ratio scaling balances learning across layers
Experiment 4: Ablation Study - NS Steps
Goal: Is 5 iterations optimal?
for ns_steps in [1, 3, 5, 10]:
    muon_opt = Muon(matrix_params, lr=0.02, ns_steps=ns_steps)
    train_model(...)  # 100 steps
Expected findings (from nanochat experiments):
ns_steps=1: ❌ Unstable, poor convergencens_steps=3: ⚠️ Good, but slight instabilityns_steps=5: ✅ Best balance (default)ns_steps=10: ⚠️ Minimal improvement, 2x slower
Practical Takeaways
Key Insights
Orthogonalization ≠ normalization
- Orthogonal updates preserve geometry, not just magnitude
- Removes harmful correlations in gradient space
Quintic iteration is a clever hack
- Doesn't fully converge, but "good enough" approximation (
S' ∈ [0.5, 1.5]) - Trades mathematical purity for speed (5 steps instead of 10+)
- Doesn't fully converge, but "good enough" approximation (
Aspect-ratio scaling is essential
- Balances learning across different layer shapes
- Often overlooked but critical for stability
Dual optimizer strategy works
- Muon for structured (2D) parameters
- AdamW for unstructured (0D/1D) parameters
- Different inductive biases for different parameter types
Muon vs AdamW: A Comparison
| Aspect | Muon | AdamW |
|---|---|---|
| Parameter Type | 2D matrices (transformer blocks) | 0D/1D (embeddings, LM head, norms) |
| Learning Rate | 0.02 (matrix params) | 0.004 (LM head), 0.2 (embeddings) |
| Momentum/Beta1 | 0.85→0.95 (warmup) | 0.8 (fixed) |
| Beta2 | N/A (no second moment) | 0.95 (fixed) |
| Adaptive LR | ❌ No per-parameter adaptation | ✅ Per-parameter via second moment |
| Weight Decay | ❌ Not used | ✅ 0.0 in nanochat (optional) |
| Gradient Processing | Orthogonalization via NS-5 | Bias-corrected moments |
| Aspect-Ratio Scaling | ✅ max(1, h/w)^0.5 | ❌ None |
| Memory Overhead | 1 buffer (momentum) | 2 buffers (exp_avg, exp_avg_sq) |
| Precision | BF16 throughout | FP32 for optimizer states |
| Typical Use Case | Pretraining from scratch | Fine-tuning, general purpose |
Why different learning rates?
# From gpt.py setup_optimizers()
dmodel_lr_scale = (model_dim / 768) ** -0.5  # Scale by √(768/d_model)

adam_groups = [
    dict(params=lm_head_params, lr=0.004 * dmodel_lr_scale),
    dict(params=embedding_params, lr=0.2 * dmodel_lr_scale),  # 50x higher!
]
TIP
Key insight: Embeddings receive sparse gradients (one-hot inputs) → need much higher LR. Muon's orthogonalization naturally balances updates → single LR works.
When to Use Muon
✅ Good fit:
- Training transformers from scratch (not fine-tuning)
- Large matrix parameters (attention, MLP)
- GPU-accelerated workloads (bfloat16 friendly)
- Scaling to large models (better than Adam at scale)
❌ Poor fit:
- Fine-tuning (Adam's adaptive LR more stable)
- CNNs with 4D convolutions (unless you flatten to 2D)
- Small models (<10M params) where AdamW is "good enough"
- CPU-only training (Newton-Schulz slower without GPU)
Hyperparameter Recommendations
Based on nanochat experiments:
- Learning rate:
lr=0.02(Muon),lr=0.004(AdamW for LM head),lr=0.2(AdamW for embeddings) - Momentum:
momentum=0.85→0.95(300-step warmup) - Nesterov:
nesterov=True(empirically better) - NS steps:
ns_steps=5(sweet spot) - LR schedule: Cosine decay with 0-20% warmup/warmdown
Common Pitfalls
Using Muon on embeddings → NaN gradients
- ❌ Problem: Orthogonalization undefined for 1D tensors
- ✅ Solution: Separate optimizer for 1D params
Forgetting aspect-ratio scaling → instability
- ❌ Problem: Tall/wide matrices learn at wrong rates
- ✅ Solution: Already built into nanochat's implementation
Too few NS iterations (1-2) → poor convergence
- ❌ Problem: Approximate orthogonalization too approximate
- ✅ Solution: Stick with default 5
Mixing bfloat16 and float32 → slowdown
- ❌ Problem: Type conversions kill Tensor Core utilization
- ✅ Solution: Keep everything in bfloat16 for speed
Conclusion & Next Steps
Summary
Muon is a powerful optimizer that exploits the geometric structure of transformer weight matrices. By orthogonalizing momentum-based updates via a clever Newton-Schulz iteration, it achieves:
- Faster convergence than AdamW (5-10% improvement)
- Better stability in bfloat16 precision
- Improved scaling to larger models
The quintic iteration is a beautiful example of trading mathematical purity for practical efficiency—5 steps of approximate orthogonalization beat expensive SVD-based methods by a wide margin.
In nanochat, Muon is combined with AdamW in a dual-optimizer strategy that respects the different inductive biases of 2D vs 0D/1D parameters. This pragmatic approach is key to training high-quality models on limited budgets.
What's Next in This Series
📡 Post 1.2: Distributed Muon (Coming Soon)
Custom gradient synchronization across 8 GPUs using ZeRO-2 optimization and block-cyclic assignment.
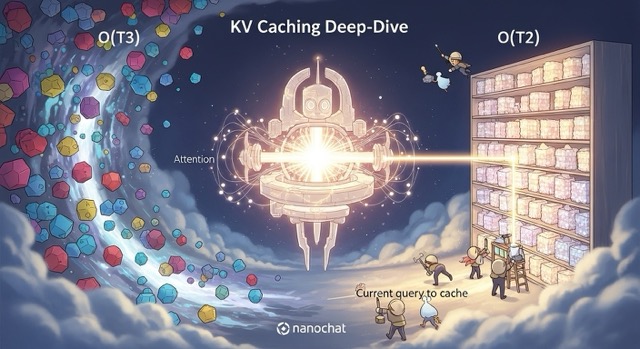
💾 Post 1.3: KV Caching Deep-Dive (Coming Soon)
Memory-efficient inference with prefill-and-clone patterns and dynamic cache growth.
🚀 Post 2.1: Training Your First Model (Coming Soon)
Complete hands-on tutorial from environment setup to trained model.
Further Reading
- Muon blog post by Keller Jordan
- Newton-Schulz iteration (Wikipedia)
- nanochat source: muon.py on GitHub
Try It Yourself
# Clone nanochat
git clone https://github.com/karpathy/nanochat
cd nanochat

# Train a small model with Muon (~20 minutes on single GPU)
python -m scripts.base_train --depth=8 --num_iterations=2000
About this series: This is part of a comprehensive blog series exploring the technical innovations in nanochat, Andrej Karpathy's minimal ChatGPT implementation.
On this page
- Introduction
- Enter Muon: MomentUm Orthogonalized by Newton-schulz
- What You'll Learn
- Visual Preview: Muon vs AdamW Gradient Flow
- Theory: Newton-Schulz Orthogonalization
- The Problem with Standard Gradient Descent
- What is the Newton-Schulz Iteration?
- The Quintic Iteration
- Why Quintic Instead of Cubic?
- Newton-Schulz Convergence Visualization
- Why bfloat16 Stability Matters
- Implementation: Muon Optimizer in nanochat
- The Muon Algorithm
- Aspect-Ratio Scaling: The Hidden Ingredient
- Momentum Scheduling: The Warmup Secret
- When Muon Works vs Fails
- Experiments: Seeing Muon in Action
- Experiment 1: Visualizing Orthogonalization
- Experiment 2: Convergence of NS Iterations
- Experiment 3: Muon vs AdamW Training
- Experiment 4: Ablation Study - NS Steps
- Practical Takeaways
- Key Insights
- Muon vs AdamW: A Comparison
- When to Use Muon
- Hyperparameter Recommendations
- Common Pitfalls
- Conclusion & Next Steps
- Summary
- What's Next in This Series
- Further Reading
- Try It Yourself